RESEARCH WORK
BACKGROUND: Building upon the success of Micro:bit unit from last year; this Micro:bit unit was re-invented Grade 3. A number of different online digital tools were utilized throughout the planning to testing phases.
The Grade 3 cohort for school year 2019-2020 went 1:1 with iPads. The school also increased it’s technological resources with new hardware and upgrading existing software, as well an expansion including a new Primary MakerSpace. It was therefore an ideal opportunity to introduce Micro:bits in Grade 3.
RESEARCH QUESTION: How does a Micro:bit coding project affect students’ creativity and application skills in solving everyday problems?
OVERALL LEARNING OBJECTIVE: Design a product with a meaningful purpose which could be powered by a Micro:bit.
FRONT-LOADING: Students were introduced to Micro:bit during the Hour of Code Week. It was important for students to have some conceptual knowledge of what a Micro:bit is, how it works; and what it can do. Last year, the Grade 4s used Scratch as the platform; for the Grade 3s this year, https://makecode.microbit.org/ was utilized. The interface was smooth, user-friendly and worked well as Grade 3s went 1:1 iPad this year. A good introductory to the topic of coding was the use of picture books. Several books were shared and were kept within easy reach of students for their own personal perusal. Suggested book titles include:
- How to Code a Sandcastle by Josh Funk
- Hello Ruby: Adventures of Coding by Linda Liukas
- Lift-the-Flip Computers and Coding by Rosie Dickens
During the Hour of Code week, students also had the opportunity to explore Scratch for those with more advanced skills, as well as Bee Bots for those new to coding. (3 Lessons)
LESSON 1 LEARNING EXPECTATION: Create an electronic mindmap and brainstorm and record possible project ideas. (2 Lessons)
Students worked in groups and collaborated on one Coggle.It mindmap. They were encouraged to be creative, think freely on all the possible useful ways a Micro:bit can be utilized. A helpful youtube video (Hint of Scrach3.0+micro:bit) helped kickstarted the creative thinking. Some very delightful ideas came up! Pancake timer, counter for how many meanies were whacked (we had to change this one due to no-violence policy but it was cute); random activity chooser etc.

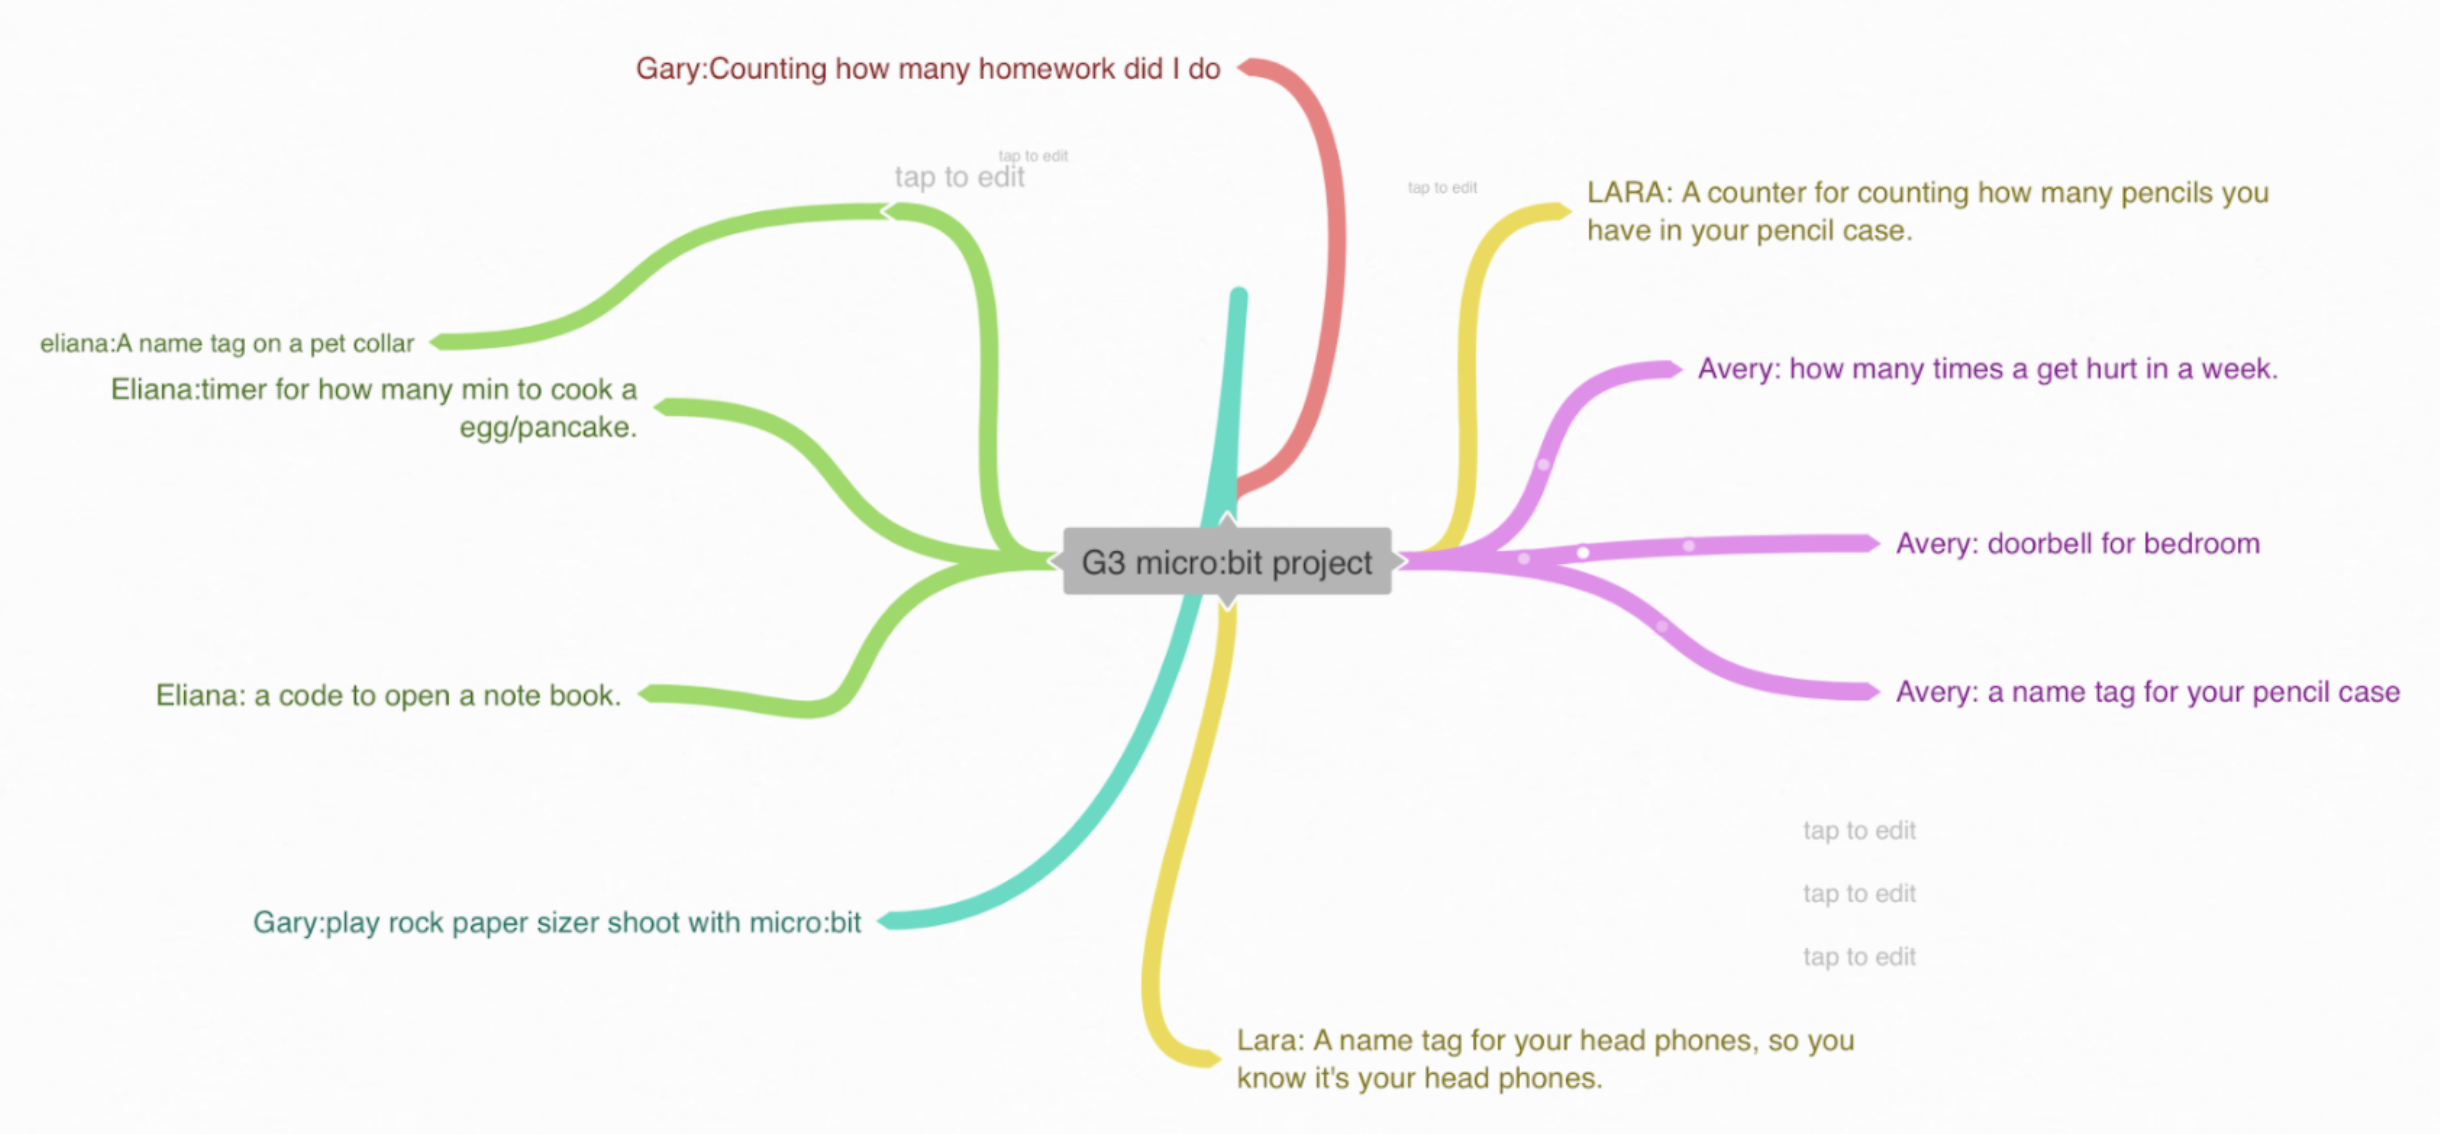
Students brainstormed some very interesting and creative ideas. Here are just a few:
- A micro:bit countdown timer to make the perfect pancake
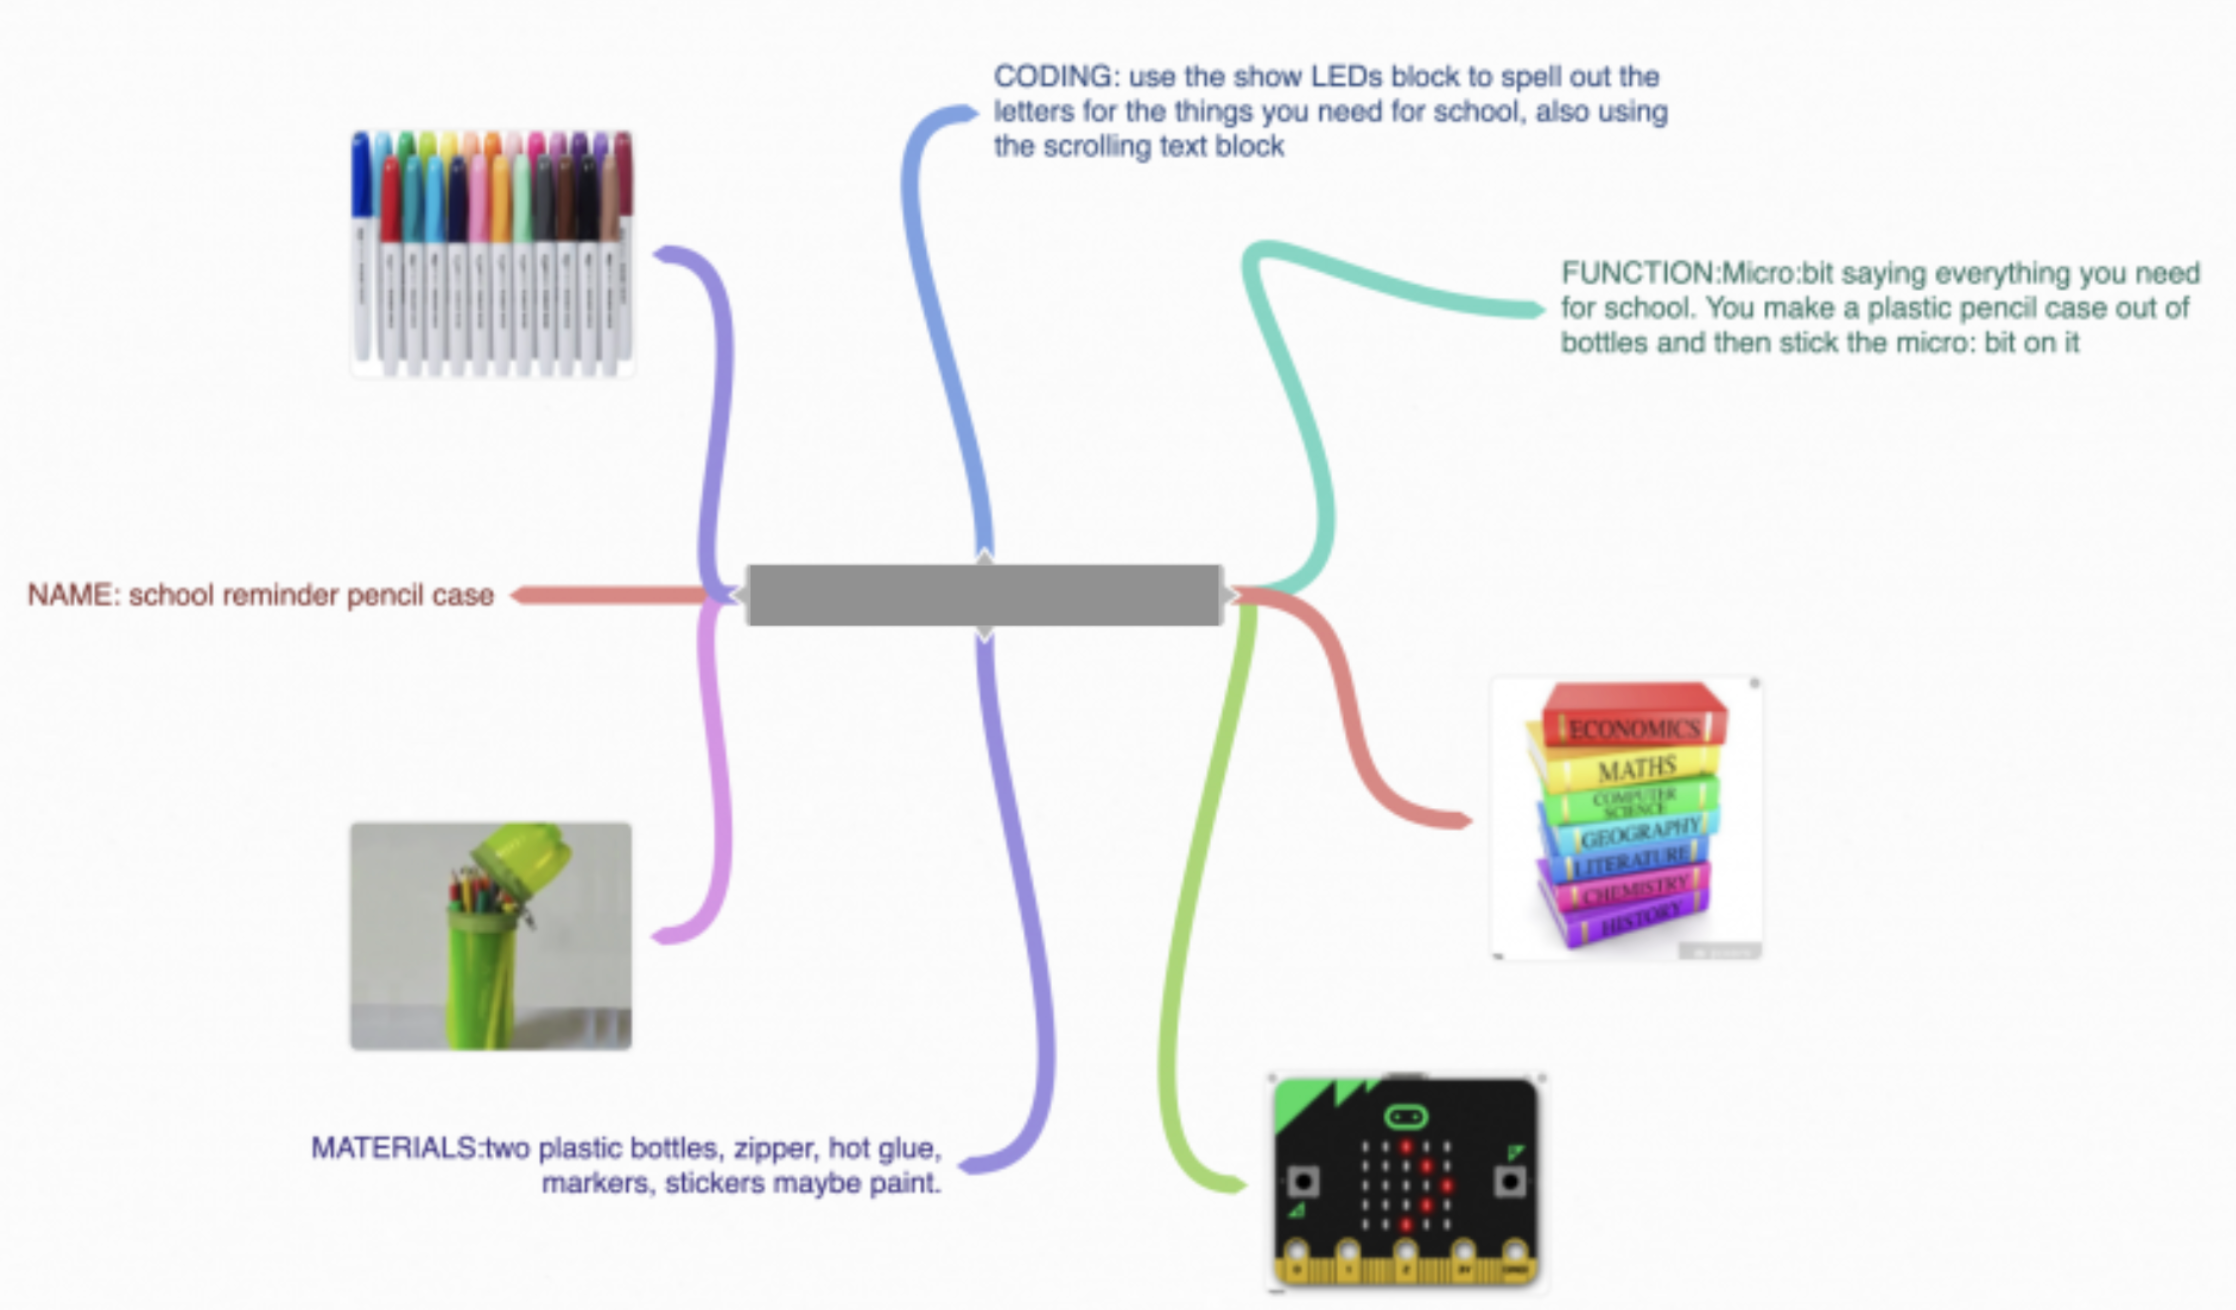
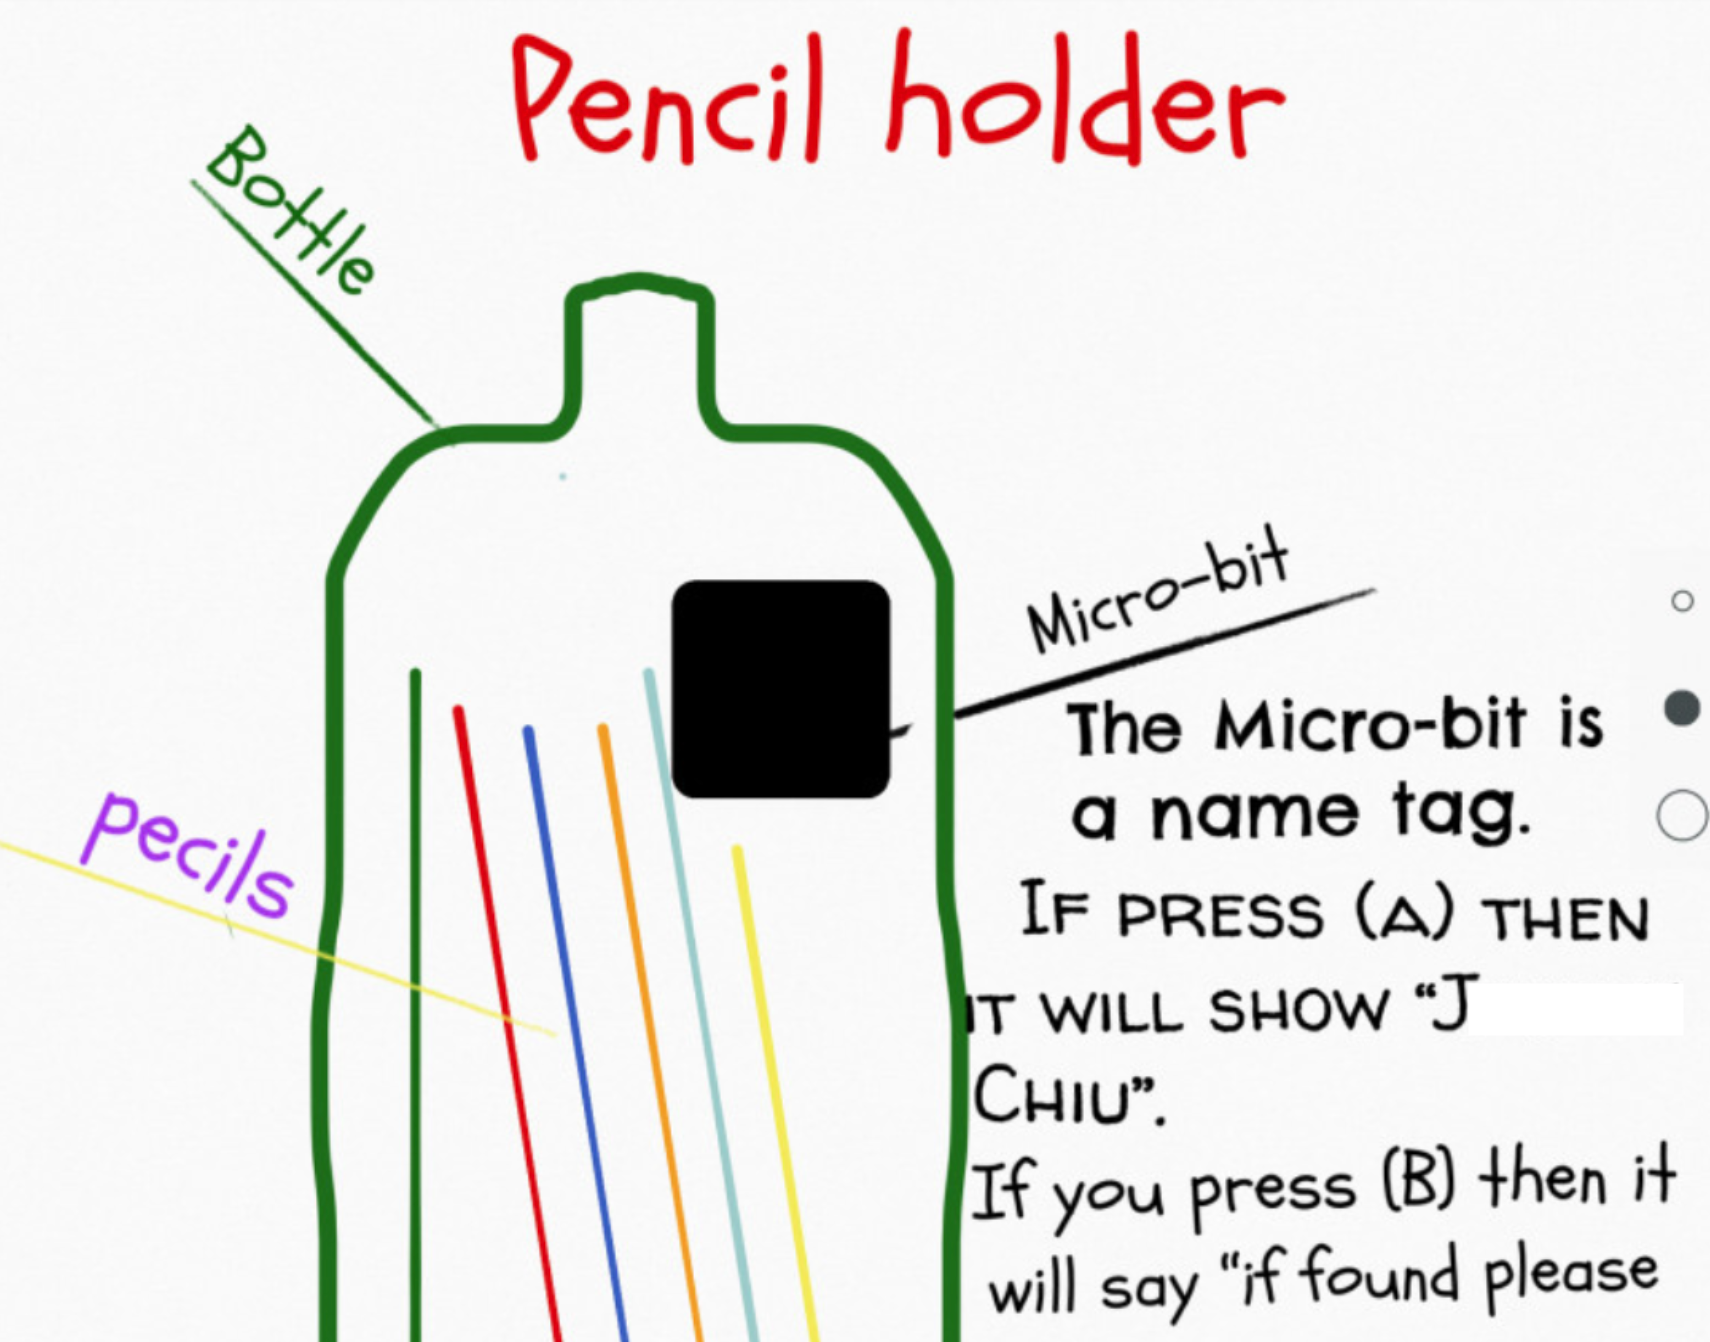
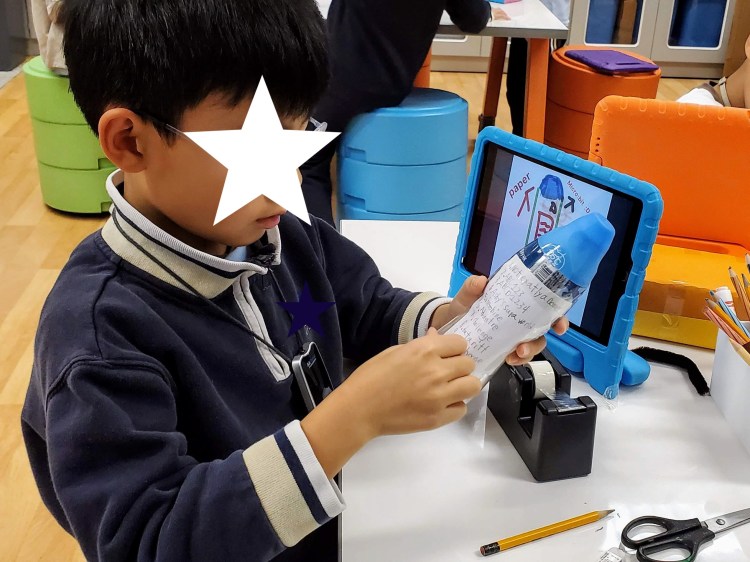
- An electronic name tag for earth-friendly pencil case made out of a plastic bottle
- An outfit chooser to help people dress faster in the mornings
- A get-out-of-the chair and stretch reminder
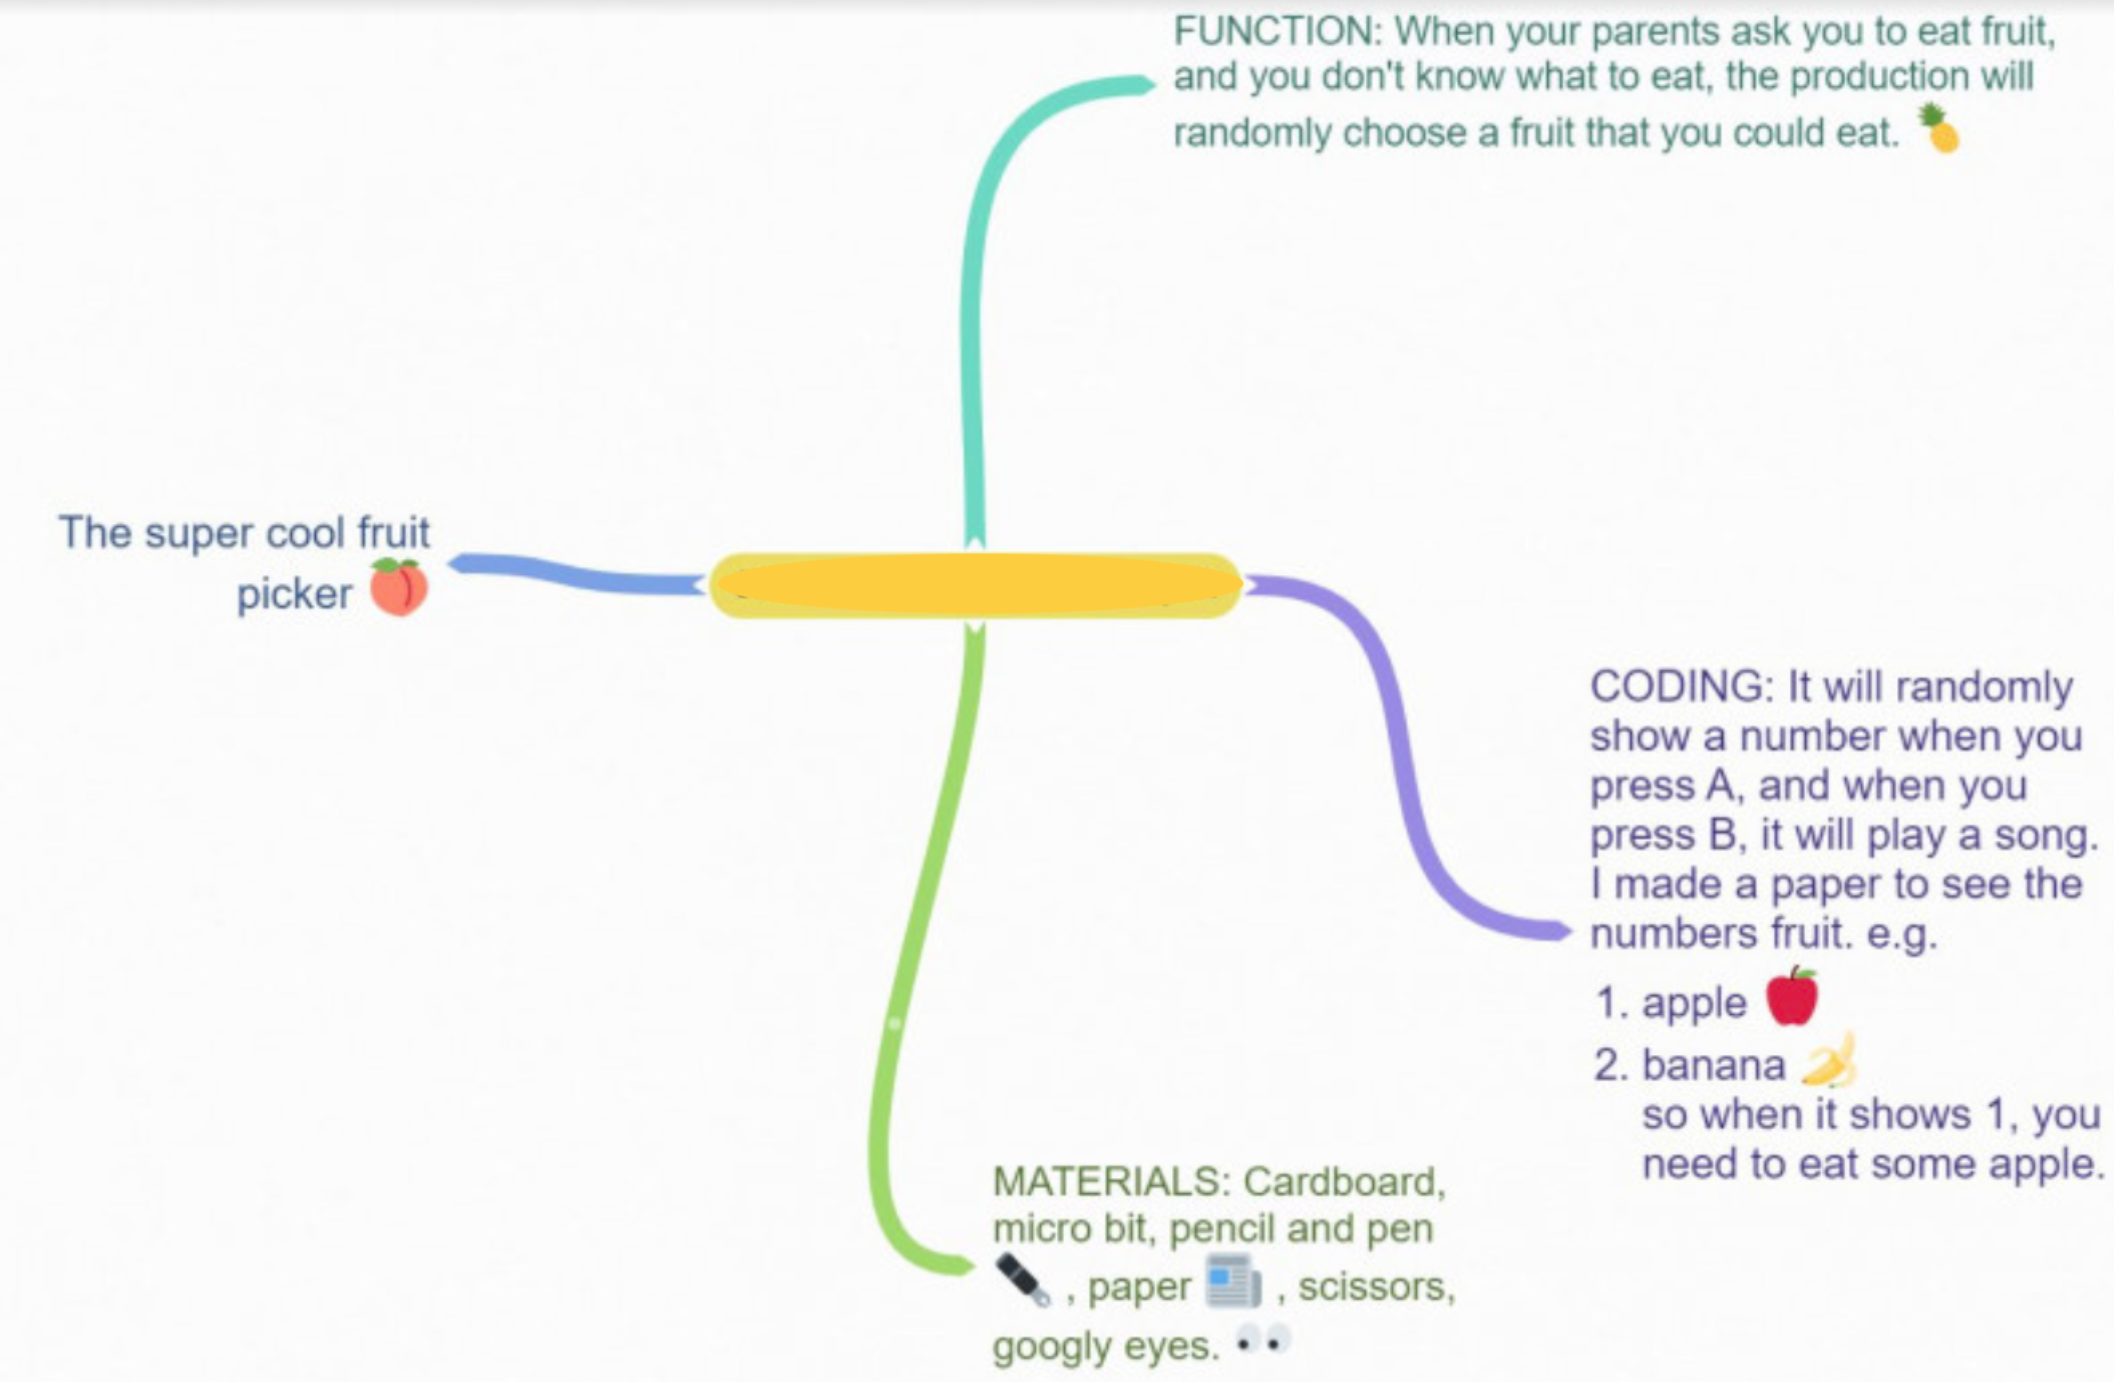
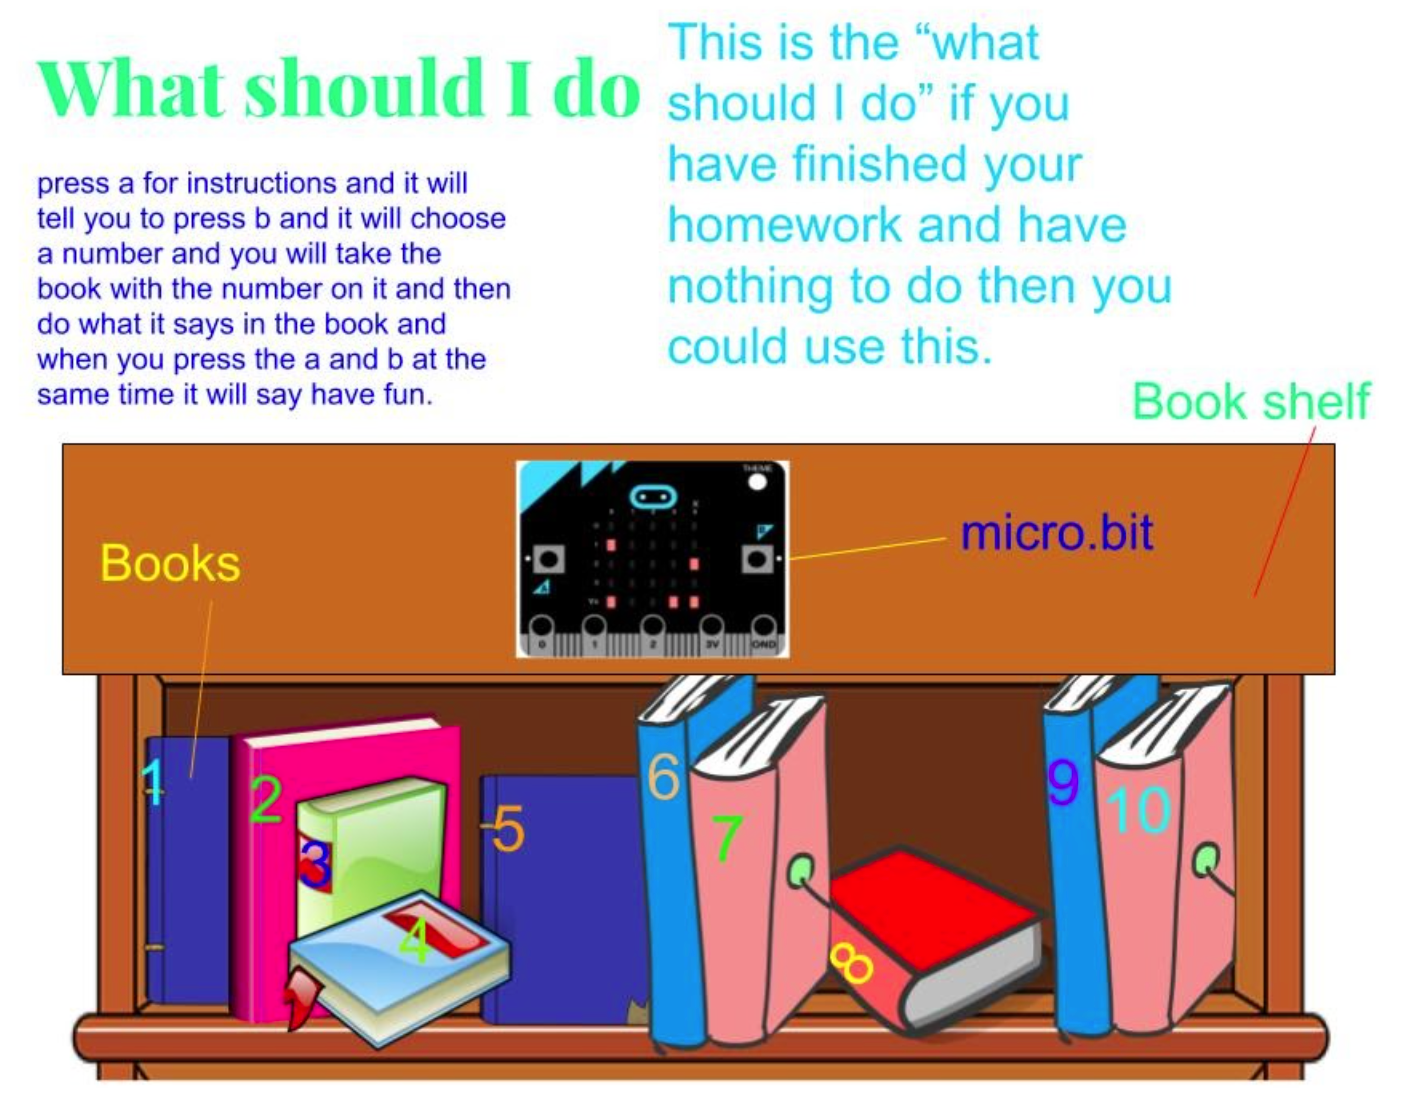
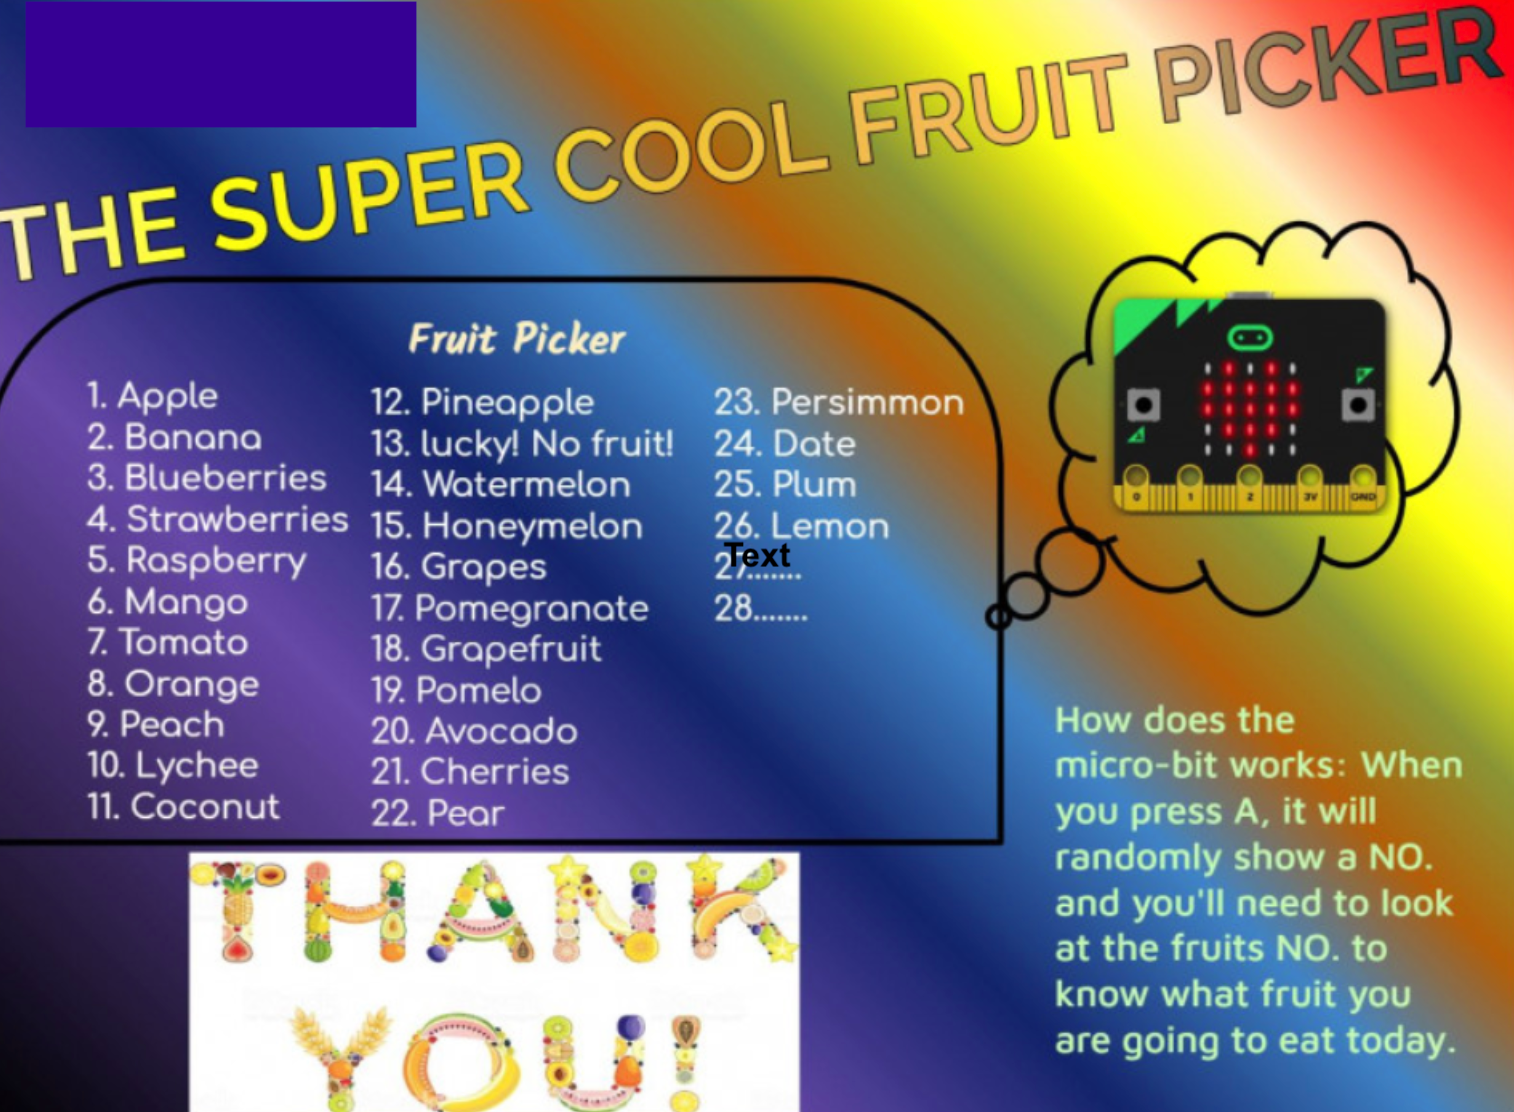
- A random activity chooser for those bored and don’t know what to do
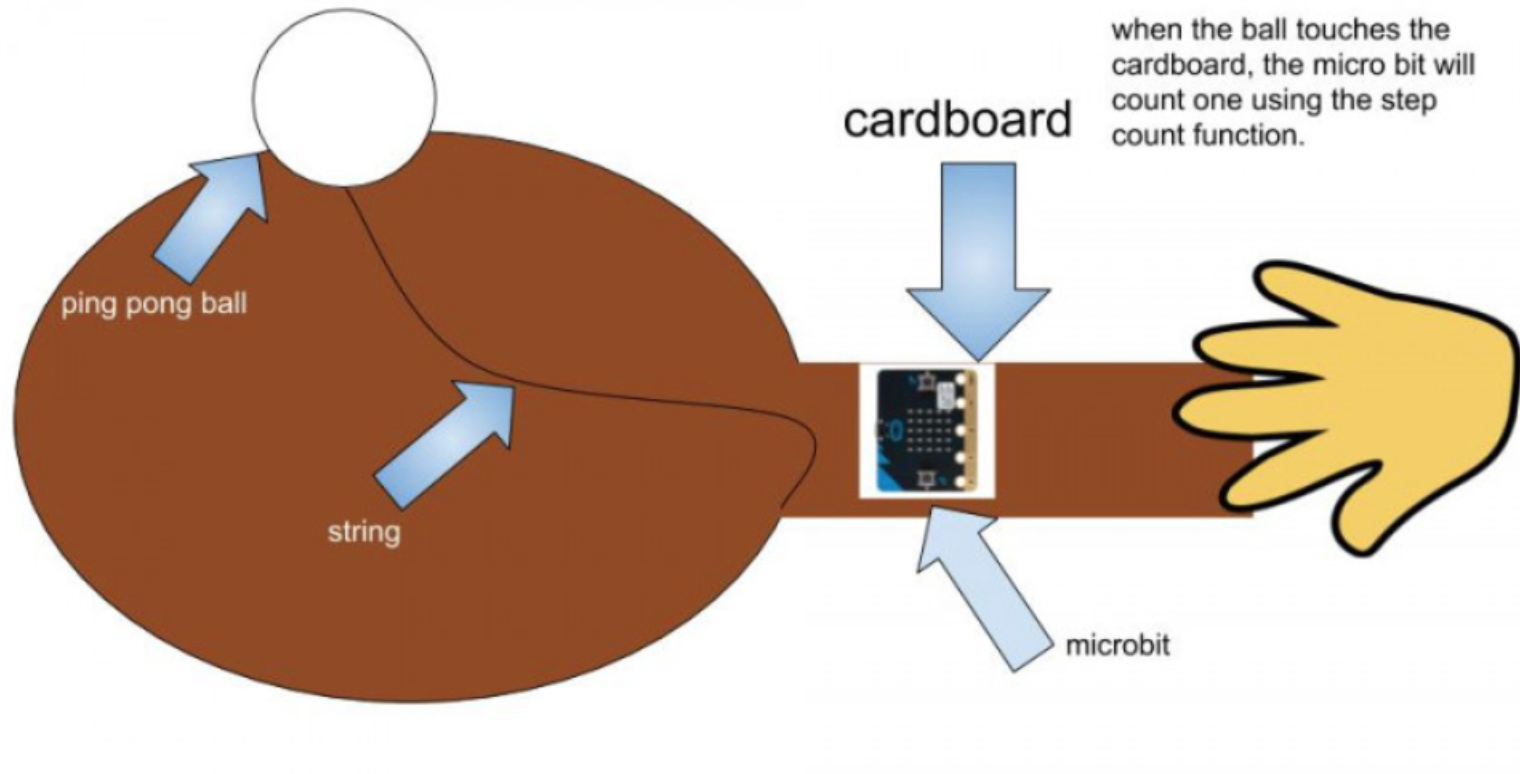
- A counter for coins

This was also a good time to review the Design Process. Key headings were posted on the board and discussion on how product designers go from researching the needs of the community to come up with useful ideas, dreaming up possible solutions, planning, creating, testing, reviewing, making changes if needed…students were told to expect the need to go back and revise and modify…just like real product designers! Throughout the project, student samples and photos were collected and posted under each of the key headings as a visual cue. A diagram of this process was posted on Moodle as well for their easy reference.
LESSON 2 LEARNING EXPECTATION: Create a digital visual representation of the project model. (2 lessons)
After a class share of their possible project ideas (some great teacher moments: “I didn’t think of that! Can I add your idea to mine?”; came the difficult decision-making time of committing to one idea. Students were given a choice of Google Draw or Tayasui Sketches School for the iPad to create a visual representation their project.


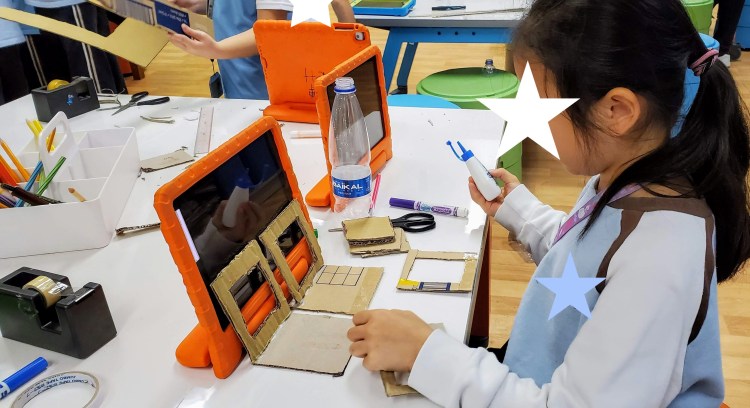
LESSON 3 LEARNING EXPECTATION: Construction of a 3D model (Introductory 2 lessons; to be continued during free time)
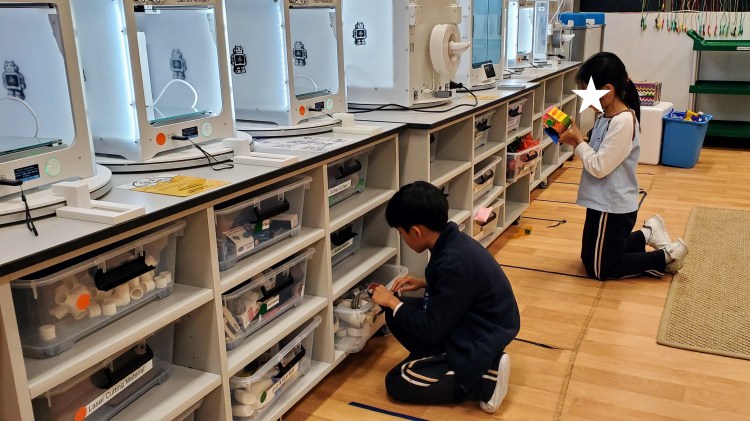
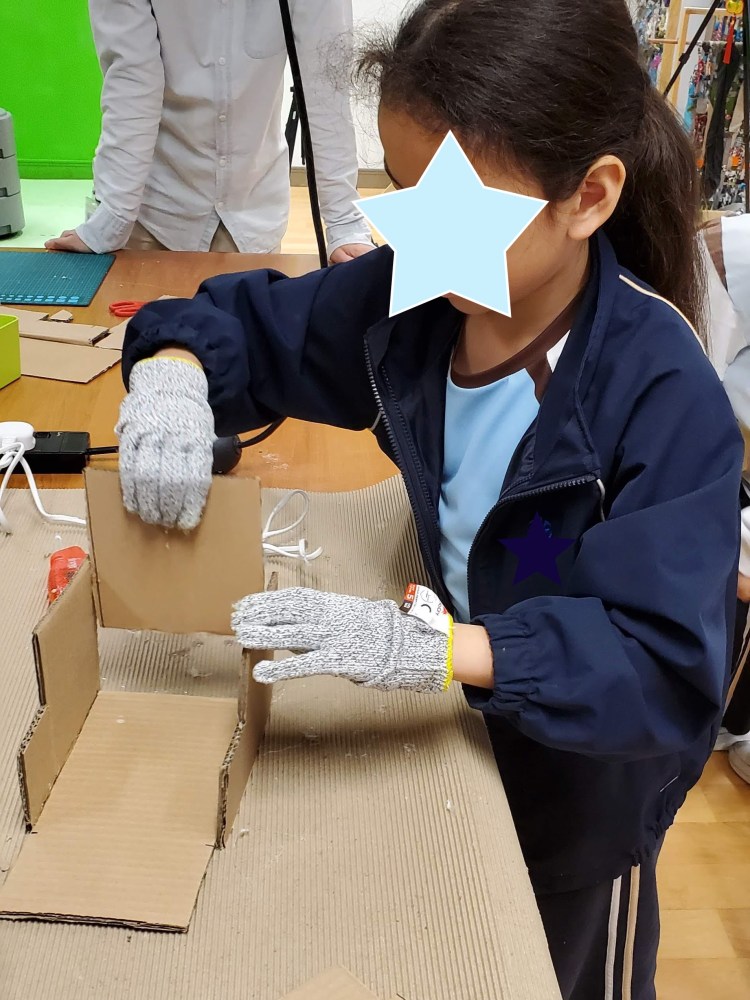
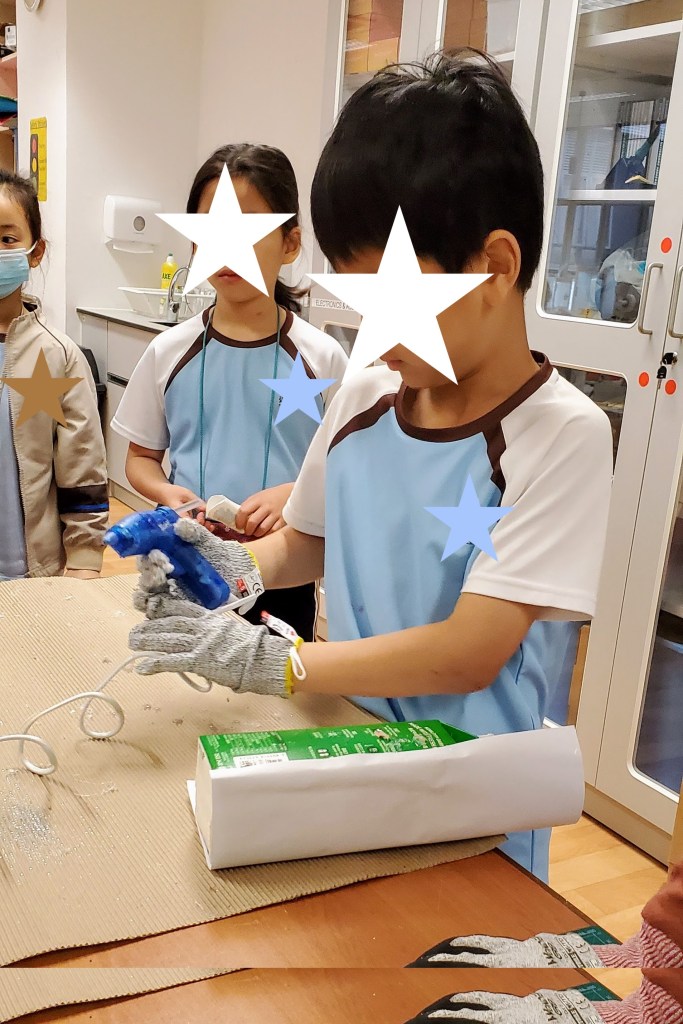
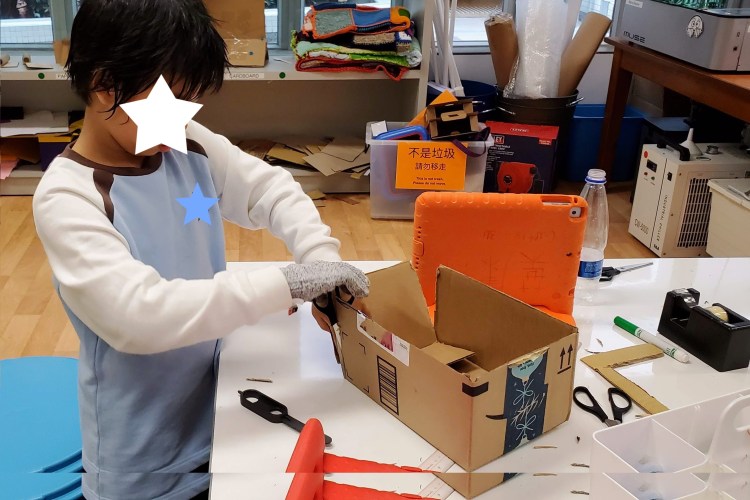
Students were excited at the opportunity to visit the new Makerspace to construct their model. Cardboard, fabric, plastic bottles were available as well as other craft-building materials.
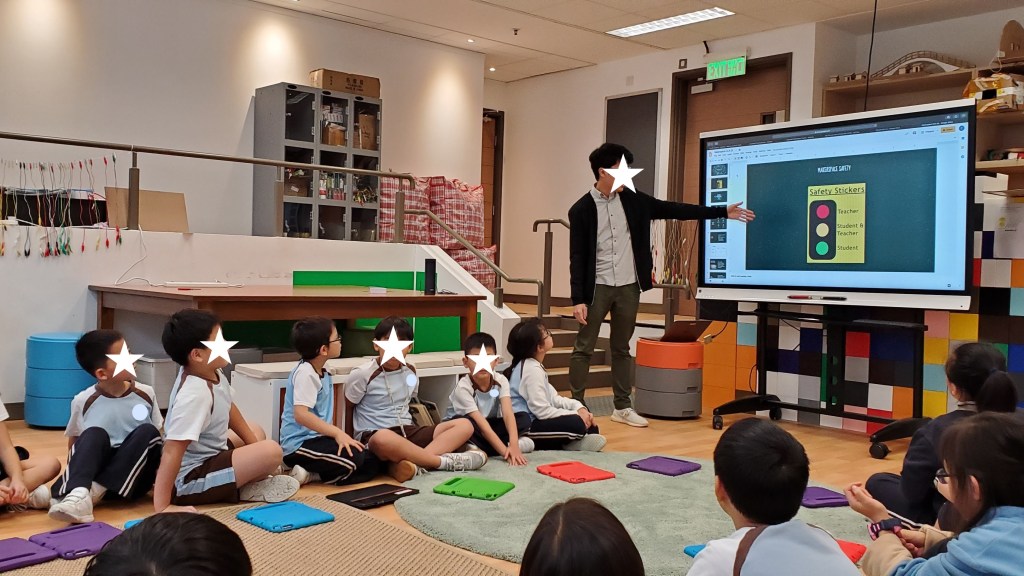
Before letting students loose for Maker fun, a talk on safety was a must. Here, our technician guided students through the safety expectations.
The Maker Spirit…While all good teaching practice involves students getting right in there with hands-online learning; a dedicated space for construction and deconstruction helps students to really get into the spirit of building, making meaningful connections between subject areas, and piecing together new ideas and understandings.
It brings to mind my own personal experience with wood, metal, textile, and food industry courses back in junior high which carried on into high school. They were certainly much looked forward classes; I was always more of a hands on learner. As technology developed and became more user-friendly to younger learners; today, they have access to these great learning experiences at a much younger age.

Not all students finished their model in one session; it was an opportunity for them to start bringing their idea to life. The focus for the next few sessions would be on creating the codes for their projects. Students will then be given free working sessions to work on what still needs to be completed.
LESSON 4 LEARNING EXPECTATION: Apply basic coding patterns to authentic life problems. (3 lessons)
While discussing project ideas with the class, it became evident that some students were seeing Micro:bit as a games only application. Wanting to stretch their thinking more; three daily life scenarios were offered. Students were asked to create codes to solve two of the three scenarios (see below). It may be a good idea to shift this lesson up near the beginning.
Scenario A: Teacher is always losing her coffee mug.
Scenario B: Teacher loves collecting shells but is losing count.
Scenario C: Student has trouble choosing which of the three set lunches offered by the canteen.

LESSON 5 LEARNING EXPECTATION: Create codes for project.
Students revisited the website https://makecode.microbit.org/ and built their codes using the iPad. Some students created codes based on the the ones explored in previous lesson while others were driven to visit the other tutorials and construct more complex codes.
LESSON 6 LEARNING EXPECTATION: Project completion – ‘free time’
Students are given additional time to complete the various components of their project. Each student is expected to test their codes with the Micro:bit attached to their model to ensure proper functioning.
Unfortunately, with school suspended, the project was stopped at this point. Students would have completed their codes and have made their models; but do not have the physical Micro:bit with them at home.
LESSON 7 LEARNING EXPECTATION: Create a video presentation of their work
Again, as a result of the Covid-19 situation, this part of the project had been suspended. It was planned for students to create a video using iMovie or Clips to present their project. A fun idea was to perhaps approach like a commercial and do a best buy vote at the end.
LESSON 8 LEARNING EXPECTATION: Reflecting on personal growth
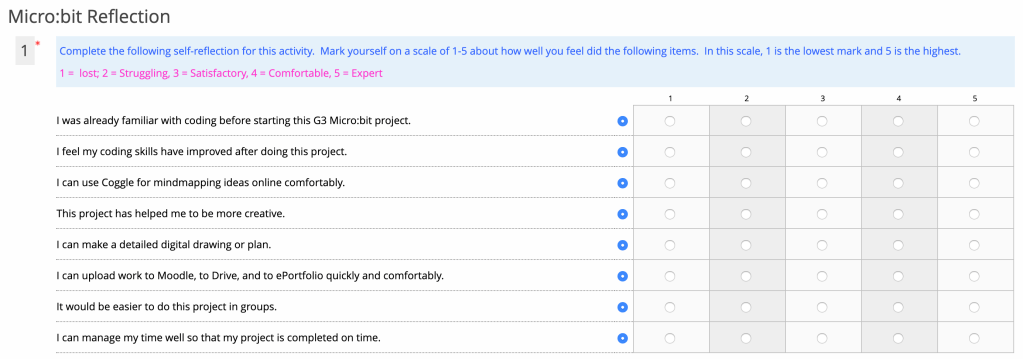
Students completed an online reflection of their learning. The survey questions were specific to a particular skill, while the short answer questions required students to describe in more details their learning.
The following short answer questions were also asked:
- Explain what you enjoyed most about this project.
- Explain one challenge you had while doing this project, and how you overcame it.
- If you can change one part of the project, what would it be and why?
Sample size of survey:
200 Number of respondents: 159 Percentage of participation: 79.5%
Results to survey questions.
The below table summarizes the responses of the 10 Grade 3 classes. The results of those who marked themselves a 4 or higher were examined; a few key findings to take away:
1.) 47% of the respondents had some experience with coding prior to the project; and 78% felt their coding skills had improved to a comfortable level after the project.
2.) 72% of the respondents felt this project helped them become more creative.
3.) 72% of the respondents felt it would have been better to work has a group.

Results to short answer questions:
#1: Three items mentioned most frequently as student’s most enjoyed part of the project. These were: coding, construction of model, and use of various digital tools i.e. Coggle.it for mindmapping. There was also the general feeling about being creative and having choice. Students wrote, “I enjoyed it because we could really use our imagination and creativity on this project,” and, “I enjoyed most about this project is I love to create things and be creative in this project.”
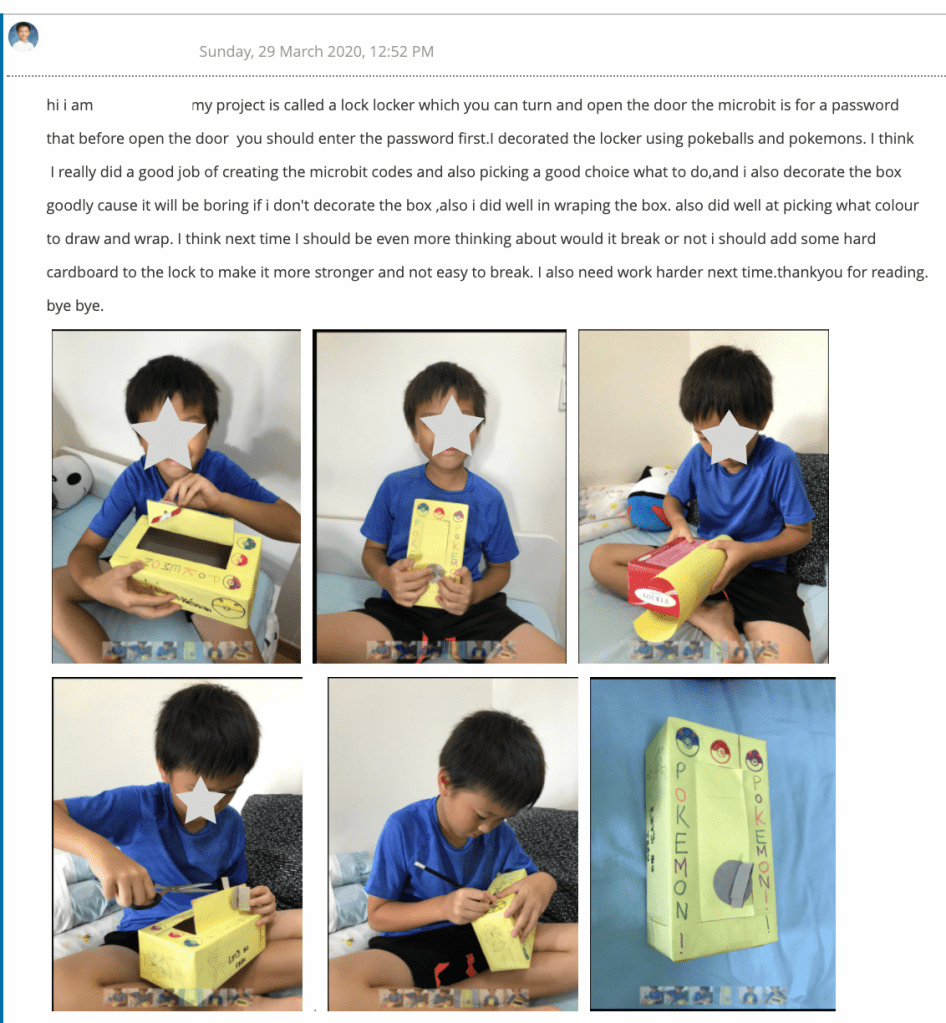
Students also expressed feelings of pride at having accomplished a challenging task. This included, “I enjoyed making the invention. I came up with a good idea, the ‘Brilliant Water Bottle’ is a great invention.”
#2. Some of the more frequently mentioned challenges mostly related to the technical aspects of coding. Examples given by students included saving the codes, how the different codes work, and as one student wrote, “I had to do the thinking for myself”. A few students also wrote about being scared to use the hot glue gun in Makerspace when constructing the model.
One student expressed frustration with using Sketches School drawing app. While the options of Explain Everything and Google Draw were given; the student and chosen Sketches School and realized it was perhaps not the best option for his purpose. He wrote, “…I regret using Sketches school, I should’ve used Google Draw or Explain Everything.”
The response from one other student highlighted that importance of approaching project work from different angles. For this particular student, the concept of backwork design helped the student to make decision as to what the project will be. The student wrote, “One of the challenges that I had while doing this project as that I culd not think of a plan. I overcame it by looking at the materials that [I] had so that I could see what thing could be possible for me to make.
Another interesting point shared by another student and which highlights backward design process is that it may be easier for some learners to approach the task ‘backward’.
#3. Response to this question varied between making changes to their own individual project work; and the suggestion that working in groups to allow for more sharing of ideas. As one student wrote, “I would want to work in groups so we can put all our ideas and skill[s] together so we will have a very creative project, and the coding will be much better, that will also help us get a higher mark.”
As the the final project was completed at home, some students shared it was difficult to find all the materials and recommended more time in Makerspace. Conversely, other students said this was not a big concern, as they simply used whatever they had at home.
EXTENSION_Student Interviews:
To have acquire a more in-depth understanding of students’ learning; interview invitations were extended to 14 students. Nine out of 14 students accepted the invitation to interview. Due to the on-going elearning program resulting from COVID-19, these interviews were conducted with Google Meet. Interview questions were given to the participants for their perusal prior to the interview and are provided below.

Interview findings:
#1. All students reported as being generally happy with themselves and their work; they delighted in being successful in creating a coded project which could solve a real-life problem. When asked if they would prefer coding a game or a coding a solution to a problem, 6 students believed coding a solution to a daily problem is more practical; students said to offer a choice, and one student said games were better.
#2. Eight students said they learnt new coding skills or got more comfortable with coding. While four students reported feeling frustrated at times when the codes did not work, they realized they had to keep trying in different ways until it did.
#3. Four students mentioned the model constructions as the most enjoyable part of the project. The enjoyed the building and constructing element to the project.
CONCLUSION:
Overall, the Micro:bit project was ideally placed in Grade 3; particular as this cohort is 1:1 iPad. Students enjoyed the project and different students felt successful in different areas as the project was designed to include a variety of different skills. Students felt their coding skills improved or at least have gotten more familiar with it. For others, they enjoyed crafting and constructing models. There were challenges along the way and the below are recommendations for next year.
Recommendations:
- Change from individual project work to group
- More time spent in class with the training tutorials on makecode.microsoft
- Shorten the brainstorming and planning section; shift the extra time to the construction and coding section
- Integrate with Visual Arts subject; looking at ways to build structures/models
Final thoughts: This has been a long project due to interruptions throughout this project time. Some were natural, such as the way the holidays fall in the school calendar; but there interruptions from street demonstrations, and then the COVID_19. I felt I may have lost some students along the way as they ran out of steam. Happily, the general feedback was that they enjoyed it; at least parts of it, and they did feel they came away with new skills or knowledge. One student interviewed reflected on the project allowed her to hone her skills in perserence; when the code didn’t work one way; she kept on trying until it did. Many students said the project allowed them to be creative; they came up with their daily-life problems to solve; create their own codes, as well as having to construct their project models. One student said she had struggled at various points during the project; but that it forced her to think ‘out of the box’, and that this is a useful life skill.
For myself, I have been delighted to see how this project has evolved, becoming more sophisticated as various technical elements had been added to it. It went from an upcycling project to a coding project. If there were more time, a video making element would have been added as well. Students could have created advertisements or commercials to market their product. Possible digital tools to use woudl be Clips or iMovie. There is definitely potential to further refine this project as well as to partner with other subject area teachers to make this an integrated project with other subjects.
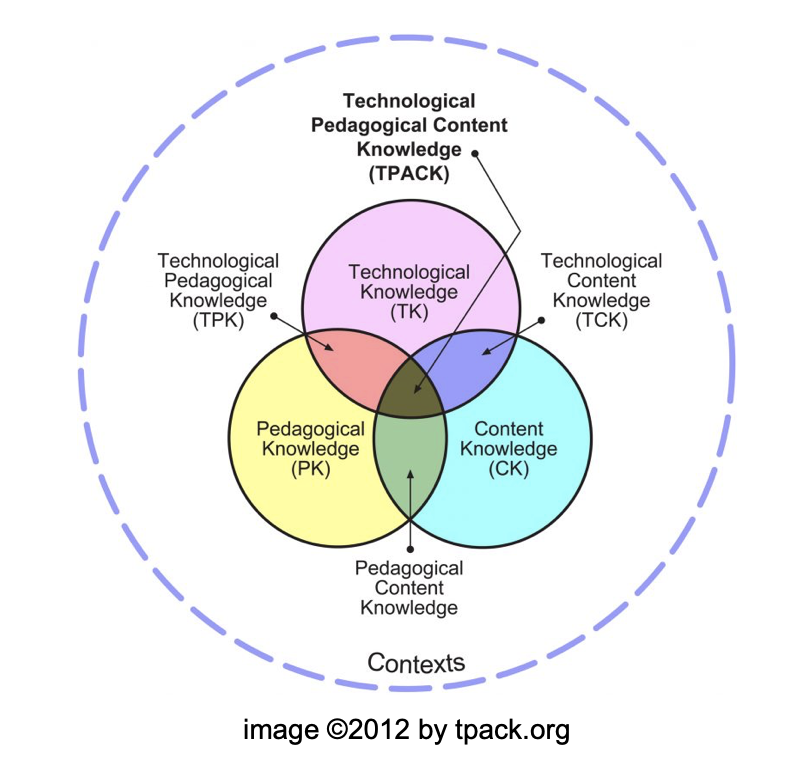
NEW thoughts: I am studying the SAMR and TPACK framework for use of technology in education. It has provided for new insights into how and what tools I use in my lessons.
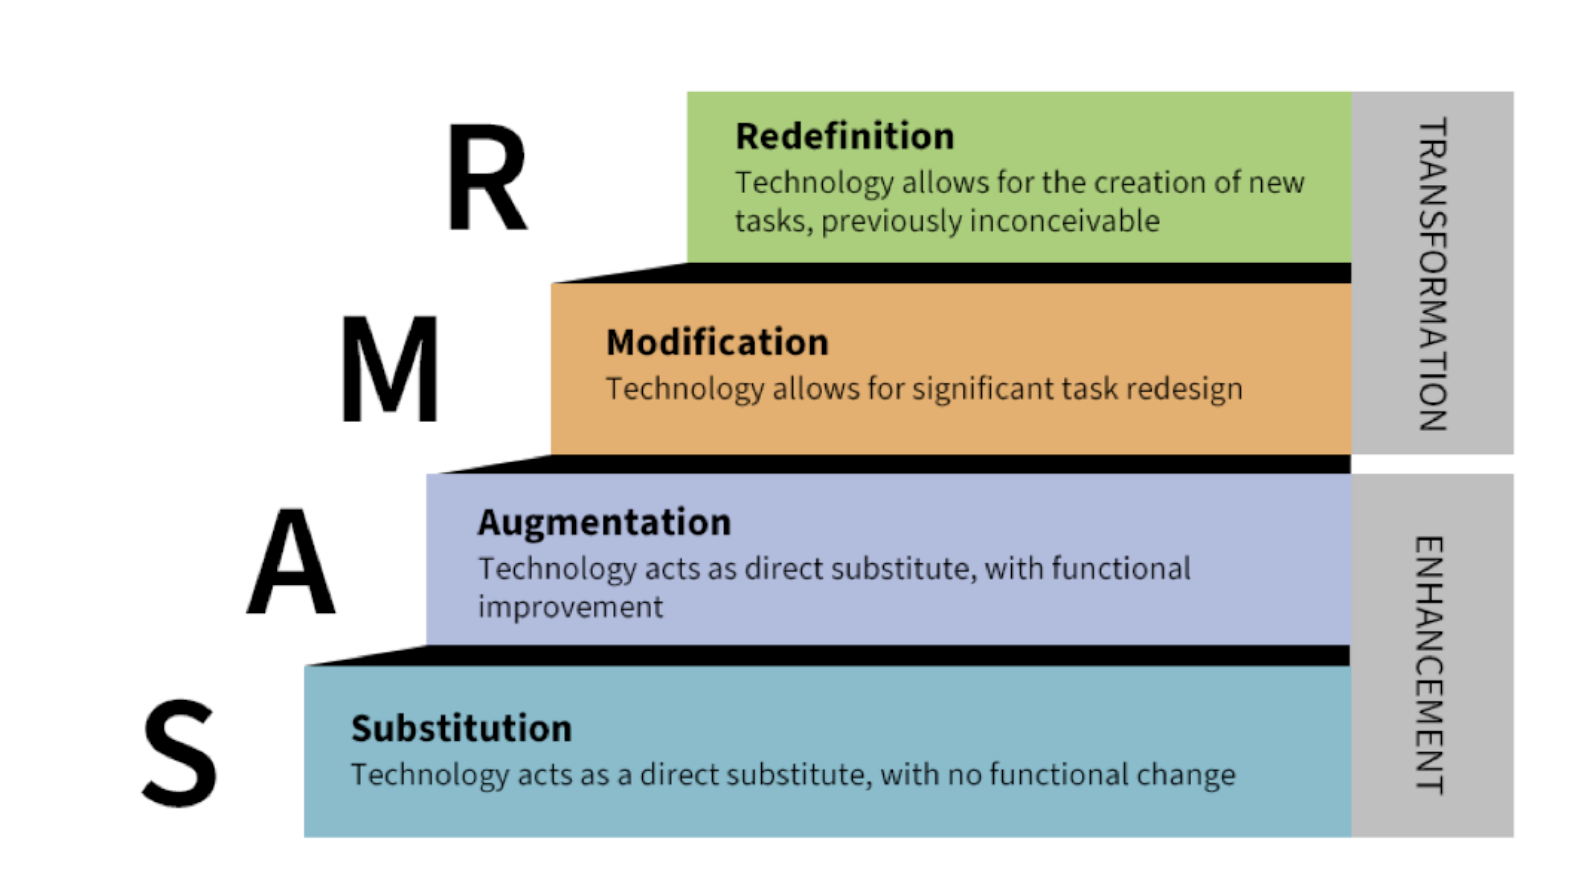
This Micro:bit project developed from one that was taught the previous year, but without the use of Micro:bits. It was an upcycling project focused on using recovered materials. Students at the time, were studying aspects of environmental care in their science class. IT skills were applied through the choice of presentation tools i.e. iMovie, Clips, Slides, Canva poster etc.
With the incorporation of Micro:bit, the project was now ‘redefined’. The inclusion of a coding device allowed for development of new skills (coding), and the end-product served a real purpose. Throughout the project, careful consideration was put into selecting tools (other than Micro:bits) which truly enhanced students’ learning. Along with best practices and solid understanding of the content standards to be addressed; I believe I hit that the “sweet spot” in TPACK.
